Opening the arms before the legs finish is the wrong way to start the drive: the handle moves, but the longest muscles have not done their work, and a long piece then loads the lower back early.
Indoor rowing form is four positions in a fixed order: the catch, the drive, the finish and the recovery. Concept2’s technique page starts the drive by pressing with the legs, then swings the back through vertical, and only then adds the arm pull. The recovery is the reverse: straighten the arms, lean from the hips toward the flywheel, and bend the knees only after the hands have cleared them. Concept2 New Zealand states the reference timing as a 2:1 recovery-to-drive ratio: for every second on the drive, spend two seconds on the recovery.
That sequence is the indoor rowing technique behind a readable split. A 2k rowing test and a long challenge use the same order; they differ in how long the order has to hold. The pace-per-500 m chart is where a 2,000 m result is compared. This page describes the published positions, the timing arithmetic and the damper-versus-drag distinction. It is not a medical prescription and it does not set a personal training plan.
Quick specs
| Input or item | Typical value or source | Why it matters |
|---|---|---|
| Drive order | Legs, then back through vertical, then arms (Concept2 technique page) | Keeps the first force on the leg drive |
| Recovery order | Arms straight, then hip lean, then knees after the hands clear them (same page) | Stops the handle colliding with the knees |
| Recovery:drive | 2:1, two seconds of recovery per second of drive (Concept2 NZ, 5 June 2018) | Sets the time available to sequence the recovery |
| Suggested stroke-rate band | 24 to 28 strokes per minute for most work; leading above 32 is not advised (Concept2 instructor manual) | A higher rate shortens both parts of the 2:1 split |
| Damper to start | 3–5; 3 for longer workouts, 5 for shorter ones (Concept2, 15 April 2019 and the damper article) | The lever changes feel, not the monitor’s definition of effort |
| Drag factor on a new RowErg | 90 or less at damper 1; 200 or more at damper 10 (Concept2, 3 January 2025) | The same lever number is not the same drag on every machine |
What the four positions require
The catch is the start, not a pause to heave with the arms. Concept2’s technique page sets it as straight arms, a neutral head, level shoulders that are not hunched, the upper body leaning forward from the hips so the shoulders are in front of the hips, and shins vertical or as close to vertical as is comfortable. The shins should not move beyond perpendicular. Heels may lift.
The drive is the work. Press with the legs first. Swing the back through the vertical position before the arm pull. The hands travel in a straight line to and from the flywheel, and the shoulders stay low. The instructor manual adds a geometric stop for the layback: press until the legs are almost fully extended but not locked, then swing the torso back to a 100-degree angle with the seat, and let the arms come in toward the abdomen only after that.
The finish is the end of that swing. The upper body leans back slightly, with the core supporting it. The legs are extended. The handle is held lightly below the ribs. Shoulders stay low, the grip stays relaxed, and the wrists stay flat.
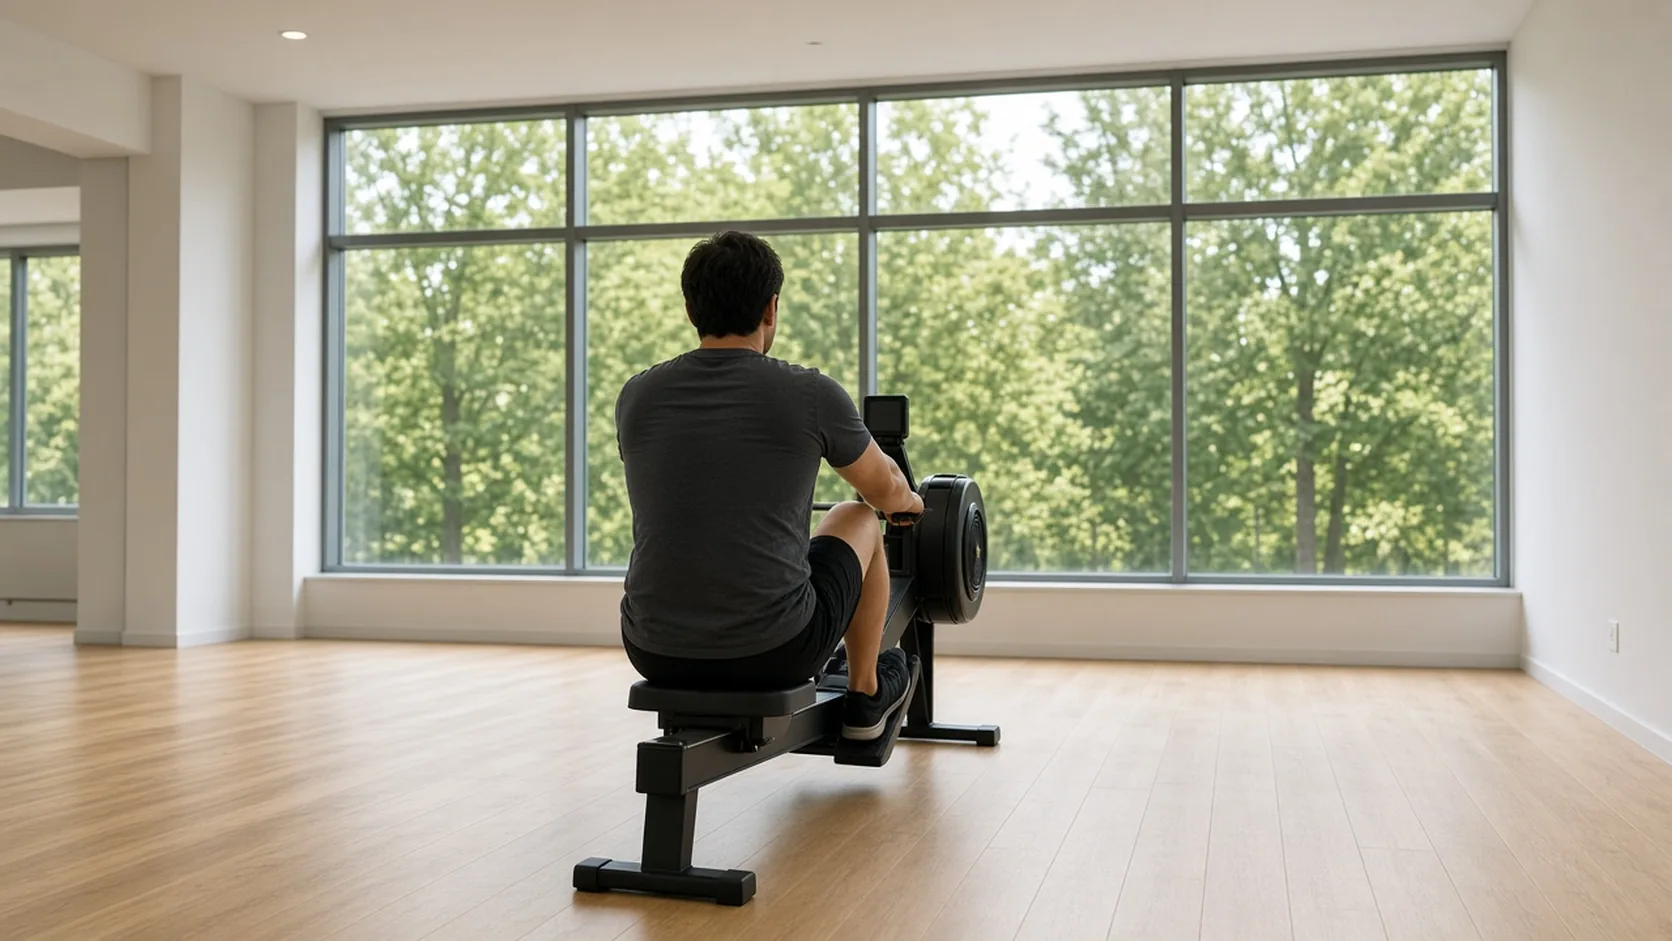
The recovery prepares the next catch. Extend the arms until they are straight before leaning from the hips toward the flywheel. Only once the hands have cleared the knees do the knees bend and the seat slide forward. The next stroke returns to relaxed shoulders and vertical shins. The opening photograph is that catch from behind: the seat is forward and the arms reach the flywheel. It is an example of the position, not a measured athlete and not a branded setup.
| Phase | Published position | Dominant failure mode | Prevention |
|---|---|---|---|
| Catch | Straight arms, level shoulders, shins at vertical and not past it | Hunched shoulders and shins past perpendicular, which shorten the leg drive before it starts | Stop the shins at vertical and keep the shoulders level |
| Drive | Legs, then the back through vertical, then the arms | Arms bend while the legs are still bent, so the back takes the load early | Keep the arms long until the legs are almost extended |
| Finish | Slight lean back, legs extended, handle lightly below the ribs, wrists flat | Handle pulled to the neck with bent wrists | Stop the handle below the ribs and keep the wrists flat |
| Recovery | Arms straighten, then the hip lean, then the knees | Knees rise before the hands clear them, so the handle hits the knees | Bend the knees only after the hands have passed them |
Takeaway: Name the phase before changing the force. The order is the form.
The drive fails when the arms move first
Concept2’s drive sentence is an order, not a list of muscles to use at once. The instructor manual says the initial portion of the drive demands the legs, and that the hip extends as the knees are finishing their extension. The arm pull belongs after the knees are extended.
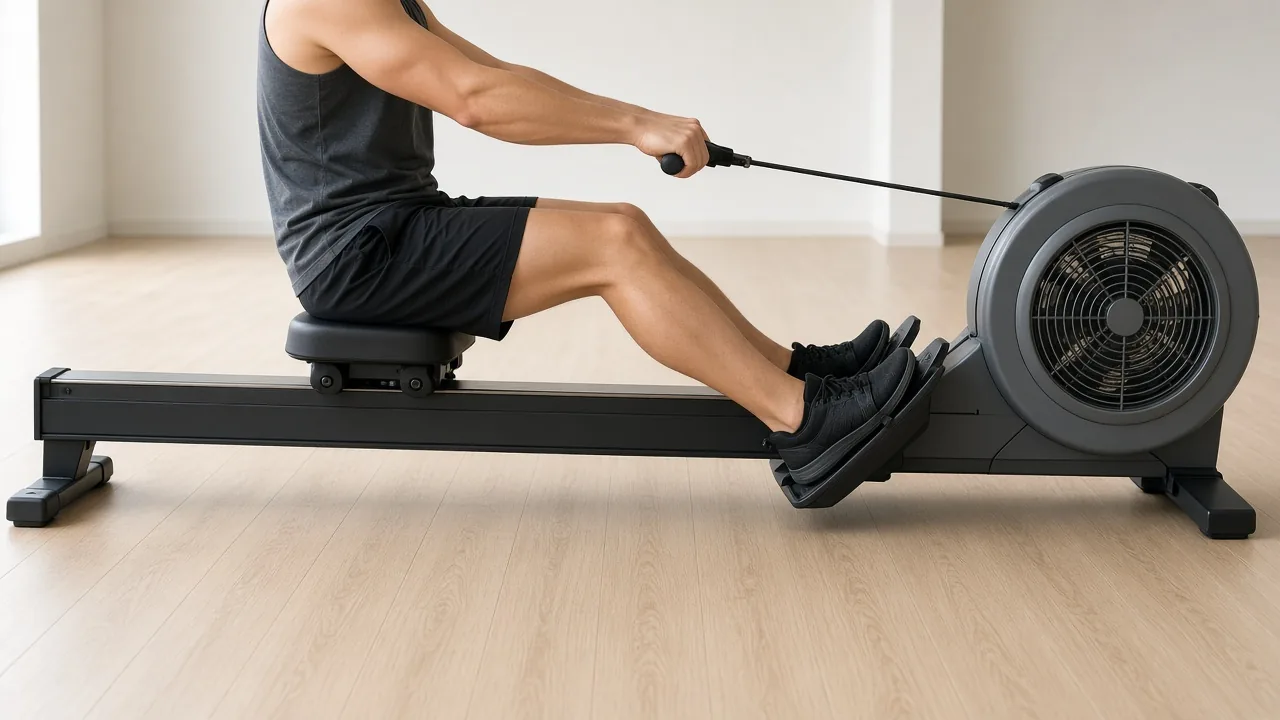
In this example the legs are nearly straight and the arms are still long. That is the moment before the back swings through and before the handle comes to the ribs. If the elbows bend while the knees are still deep, the stroke has skipped the leg drive.
Rules of thumb. If the elbows bend before the knees are almost straight, the drive order has already failed: straighten the arms and finish the leg press before the back swings. If the damper setting is above 5 on a piece longer than a short sprint, move it back toward 3, because Concept2 assigns damper 3 to longer workouts and damper 5 to shorter ones, and its 2019 note says a higher damper is difficult to sustain with effective technique.
The same order is what makes a split on the pace-per-500 m chart worth comparing. Stroke rate does not replace it. The instructor manual says most work sits at 24 to 28 strokes per minute and that leading a workout above 32 is not advised. A faster rate still has to keep legs, then back, then arms.
Takeaway: Legs finish their extension before the arms bend.
Recovery time is about twice the drive
Concept2 New Zealand, writing on 5 June 2018, states a 2:1 recovery-to-drive ratio: for every second on the drive, spend twice that on the recovery. The instructor manual tells coaches the same shape, with the pull faster than the recovery, near one part drive to two parts recovery. On the indoor rower, that longer recovery is the time used to straighten the arms and to lean forward before the knees come up.
The arithmetic is fixed once the stroke rate is chosen:
stroke cycle (s) = 60 / stroke rate (strokes per minute)
drive (s) = stroke cycle / 3
recovery (s) = stroke cycle − drive
Worked example, using 24 strokes per minute, which sits at the low end of the manual’s 24–28 band: stroke cycle = 60 / 24 = 2.50 s. Drive = 2.50 / 3 = 0.83 s. Recovery = 2.50 − 0.83 = 1.67 s. At the top of that band, 28 strokes per minute, the same split is tighter: 60 / 28 = 2.14 s, so the drive is 0.71 s and the recovery is 1.43 s. The recovery is still twice the drive, but both pieces are shorter, which is why a rushed knee costs more at the higher rate.
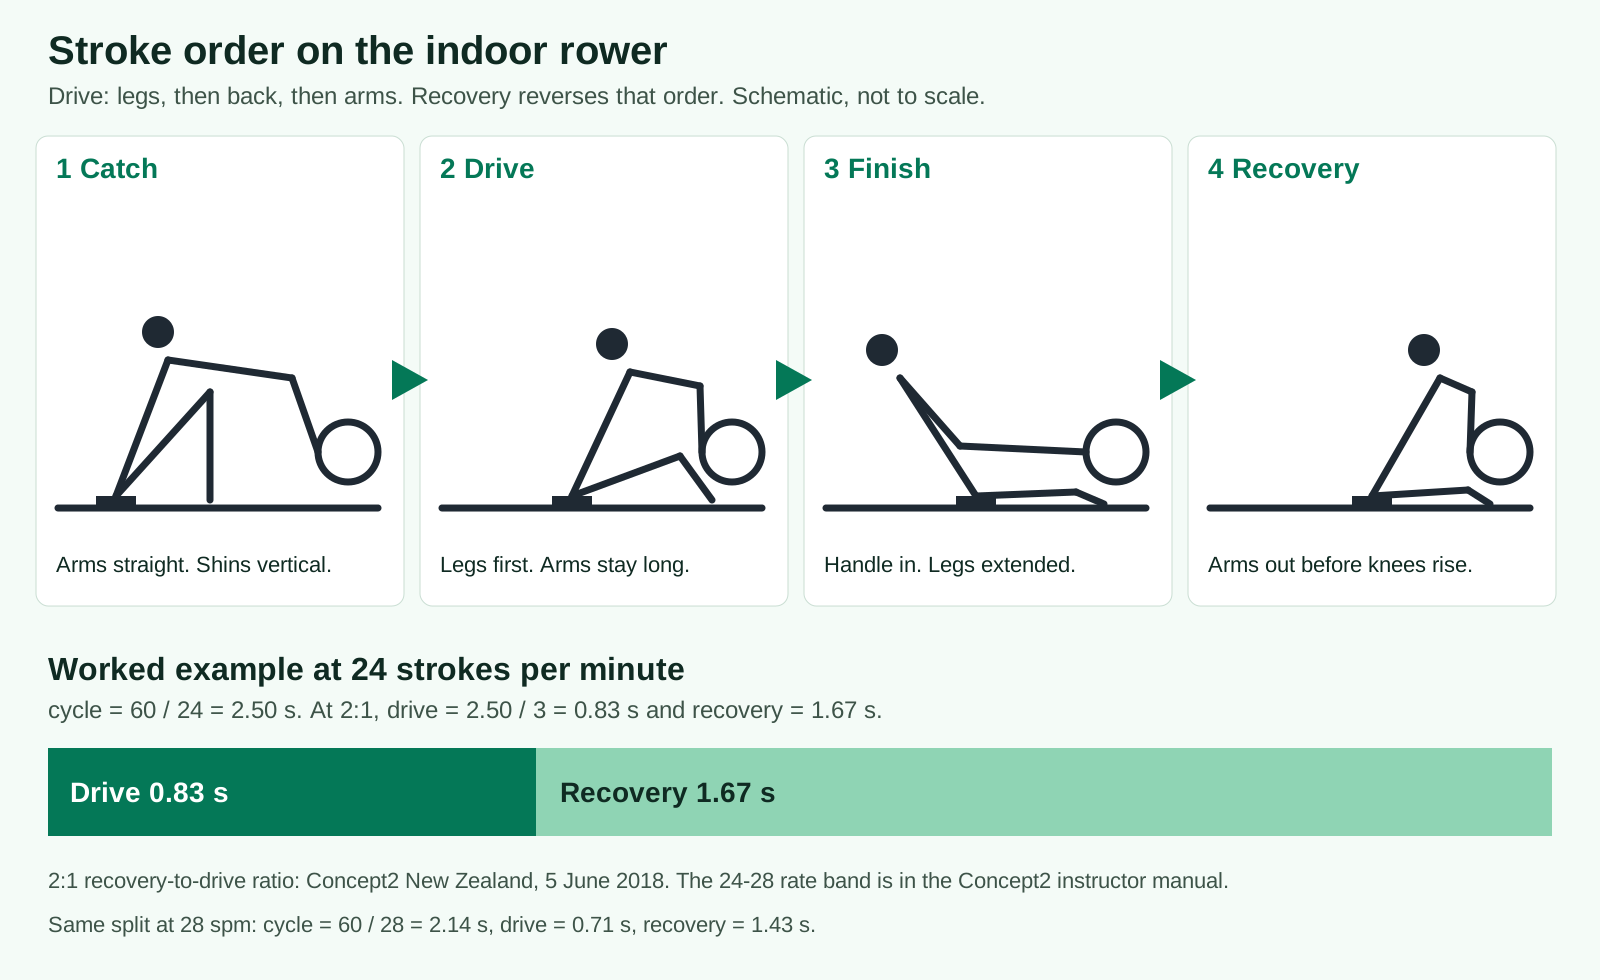
The diagram is a schematic, not a tracing of a particular body. The bar is the 24-stroke example above: one-third drive, two-thirds recovery.
Concept2 New Zealand also ties the ratio to drag. If the drag factor is too high for the stroke rate the rower is trying to hold, the drive becomes too heavy to accelerate, and the 2:1 split collapses. Lightening the drag factor is what restores a quicker drive and leaves time on the recovery. That is a sequencing limit, not a promise that any particular drag factor produces a faster split.
Rules of thumb. If the recovery is no longer than the drive at 24 strokes per minute, the 2:1 split is gone: the recovery should be near 1.67 s and the drive near 0.83 s. If stroke rate is above 28 and the arms are not straight before the knees rise, the recovery window (1.43 s at 28) has been spent on the slide instead of on the arm extension.
Takeaway: Budget twice as long for the recovery as for the drive, then check that the arms finish their reach inside that window.
Damper setting is not drag factor
The damper is the lever on the flywheel housing. Concept2 numbers it from 1 to 10. A higher number lets more air into the cage, so the flywheel slows faster between strokes and the next stroke has to accelerate it again. A lower number lets in less air. Concept2 compares this to bicycle gearing: it changes the feel. It does not, by itself, set how hard the workout is. How hard the legs, back and arms pull sets the intensity. The monitor measures how fast the flywheel decelerates between strokes, calls that the drag factor, and uses it on the next stroke so scores from different machines can be compared.
A damper number does not travel cleanly from one machine to another. Concept2 says a 3 at home can feel like a 4 in a gym, because temperature, elevation and lint in the housing change the drag. The 3 January 2025 note gives the span on a brand-new RowErg: a drag factor of 90 or less at damper 1, and 200 or more at damper 10. Check the drag factor on the monitor when two machines must feel alike. The display path Concept2 gives is More Options, then Display Drag Factor.
| Source, with date | What was stated | What it is not |
|---|---|---|
| Concept2 damper article | Start at damper 3–5. A lever set too high can exhaust the muscles before the cardiovascular work. Lower settings suit aerobic work; higher settings make the piece more of a strength workout. | A required drag-factor number |
| Concept2, 15 April 2019 | Damper 3–5 for most workouts; 3 for longer pieces; 5 for shorter ones. Change the lever only on a rest. High damper and drag may lead to injury because each stroke must move a larger volume of air, especially from a stopped flywheel. Very low settings such as 1 need a quick, light catch. | A ranking of athletes |
| Concept2, 3 January 2025 | A new RowErg reads 90 or less at damper 1 and 200 or more at damper 10. Most records, Concept2 says, are set from the 3–5 start. | A target for every rower |
| Eric Murray, quoted by Concept2 on 30 July 2018 | He used drag factor 130, which he describes as the New Zealand trials figure he grew up with, including his 2k pieces. | A universal 2k setting |
| Caryn Davies, same interview | About 125 on her own machine, usually near damper 4. She calls 120–135 a normal range depending on size and strength, and calls damper 10 a recipe for injury. | A required women’s setting |
| Gevvie Stone, same interview | About 112, up to 115 when the rate is capped at 24 or below. She also calls a workout at 10 a recipe for injury. | A ceiling everyone must sit under |
| Linda Muri, same interview | 115, which she says is slightly lower than her own national-team setting, chosen so the flywheel still moves smoothly | A coaching standard for every lightweight |
The 120–135 band is Caryn Davies’s description of the range she uses, published by Concept2. It is not a Concept2 specification, and it is not the same statement as “everyone rows at 110–130.” Murray’s 130, Stone’s 112 and Muri’s 115 are three consistent choices inside or beside that interview, which is why copying a single number off a forum fails the comparison the monitor was built to make.
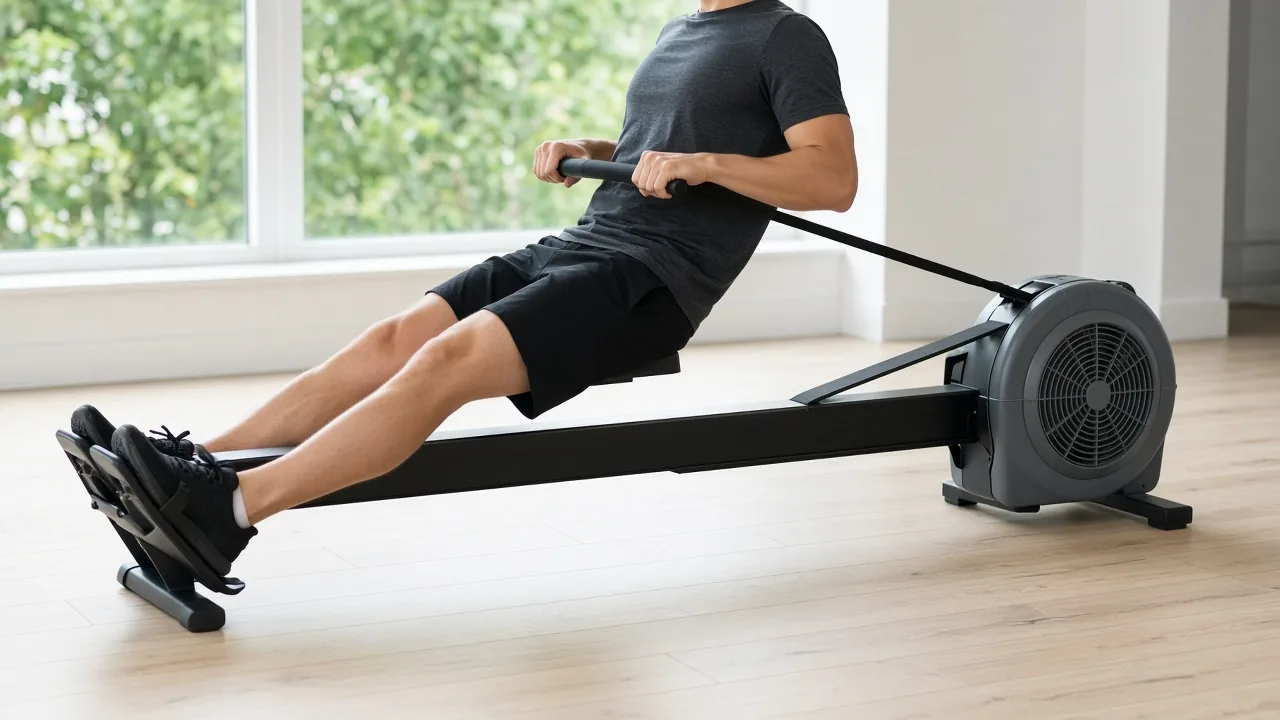
The finish in the photograph is the position that has to survive the damper you actually set. A heavier drag makes that arm pull, and the first strokes from a stopped wheel, more forceful. Concept2’s 2019 note is direct about the cost: high damper and drag settings may lead to injury. Davies and Stone, in the 2018 interview, each call damper 10 a recipe for injury. The practical cost on a shared machine is a piece that stops early because the muscles are spent, which is the outcome the damper article warns about when the lever is too high. For a challenge counted in metres, plan the damper at the 3–5 start, then judge the row by the split the monitor shows. How those splits add up over a long distance is the subject of the pace chart, and the first weeks of short pieces are laid out in the beginner rowing workouts.
Takeaway: Match machines by drag factor, and start the lever at 3–5 rather than at 10.
When this does not apply
These positions are Concept2’s published indoor-rowing sequence. They do not transfer unchanged to a boat, where the oar, the crew and the water add constraints this page does not cover. They also do not describe another manufacturer’s monitor. Concept2’s drag-factor numbers and the 90-to-200 span are about its own flywheel and its own monitor.
The athlete drag factors are interview answers from 30 July 2018. They explain how those rowers set their own machines. They are not a pass mark for a challenge, and they are not a reason to ignore pain. This site does not prescribe training loads or medical care. If a stroke causes pain, stop and get a qualified person to look at it rather than forcing the diagram.
The 2:1 arithmetic assumes the ratio Concept2 New Zealand states. It is not a measurement of any one person’s split times. At very low rates the recovery can be longer than twice the drive; at a sprint the ratio tightens because both parts get shorter. The manual’s suggestion of 24 to 28 strokes per minute is the band used for the worked example, not a rule that every challenge must be rowed inside it.
Takeaway: Use the sequence and the ratio on a Concept2-style indoor rower, and treat the interview drag factors as reported personal settings.
Method and sources
The positions are quoted from Concept2’s indoor rowing technique page as fetched on 20 October 2026. The 100-degree layback, the 24–28 stroke-rate band and the near-1:2 coaching line are from the Concept2 instructor manual PDF dated May 2024 in the file URL. The 2:1 wording and the warning that a high drag factor collapses that ratio are from Concept2 New Zealand, 5 June 2018. Damper 3–5, the injury note on high drag, and the new-RowErg span of 90 or less to 200 or more are from Concept2’s damper article, the 15 April 2019 damper note and the 3 January 2025 damper note. The named drag factors are the speakers’ own figures in Concept2’s 30 July 2018 interview. The timing bar uses only the 2:1 ratio and the formula above. Photographs show a generic machine and are examples of the positions, not test results.